IMPORT SHIPMENT DATA
Optimize your operations with the JUMiNGO Excel/CSV import and increase the efficiency of your shipping processes.
If you regularly send many shipments, you know the problem: copying addresses, matching data, manual entry – it costs time and nerves. Automate the entire preparation: import all shipping data at once instead of creating each shipment individually in the shipping cost calculator.
What are the advantages of importing?
1. Create hundreds of shipments at once
Import addresses, dimensions, weights, customs data, and shipping services in one step.
2. Automate the booking process
Create and book shipments without manual entries – for maximum efficiency.
3. Seamless integration of your ERP and shop data
Use existing CSV/Excel exports directly for import and save duplicate maintenance work.
What data can be imported?
In addition to recipient addresses, you can import the following information per shipment:
Sender and recipient address
- Company name
- Name
- Street and house number
- Second address line
- Postal code
- City
- Country (spelled out or ISO code)
- Phone number
- Email address
Parcel data
- Quantity
- Weight
- Length
- Width
- Height
Customs data
- Quantity
- Value of goods
- Description of goods
- Customs tariff number
- Country of origin
- Invoice currency
- Invoice number
- Invoice date
- Net weight
- Reason for export
Additional information
- Reference number
- Email address to receive a tracking link
- Email address to receive a tracking link + the label
Rate ID
Each JUMiNGO rate has an individual Rate ID. You can find it in the shipping cost calculator under rate details. If you import this ID, the rate will be calculated directly during import.
Shipping insurance
You can also import data for shipping insurance.
How does the import work?
The import process consists of four simple steps:
1. Prepare CSV/Excel file
Create a file with your shipment data. Use either the JUMiNGO sample file or your exported file from WWS or ERP.
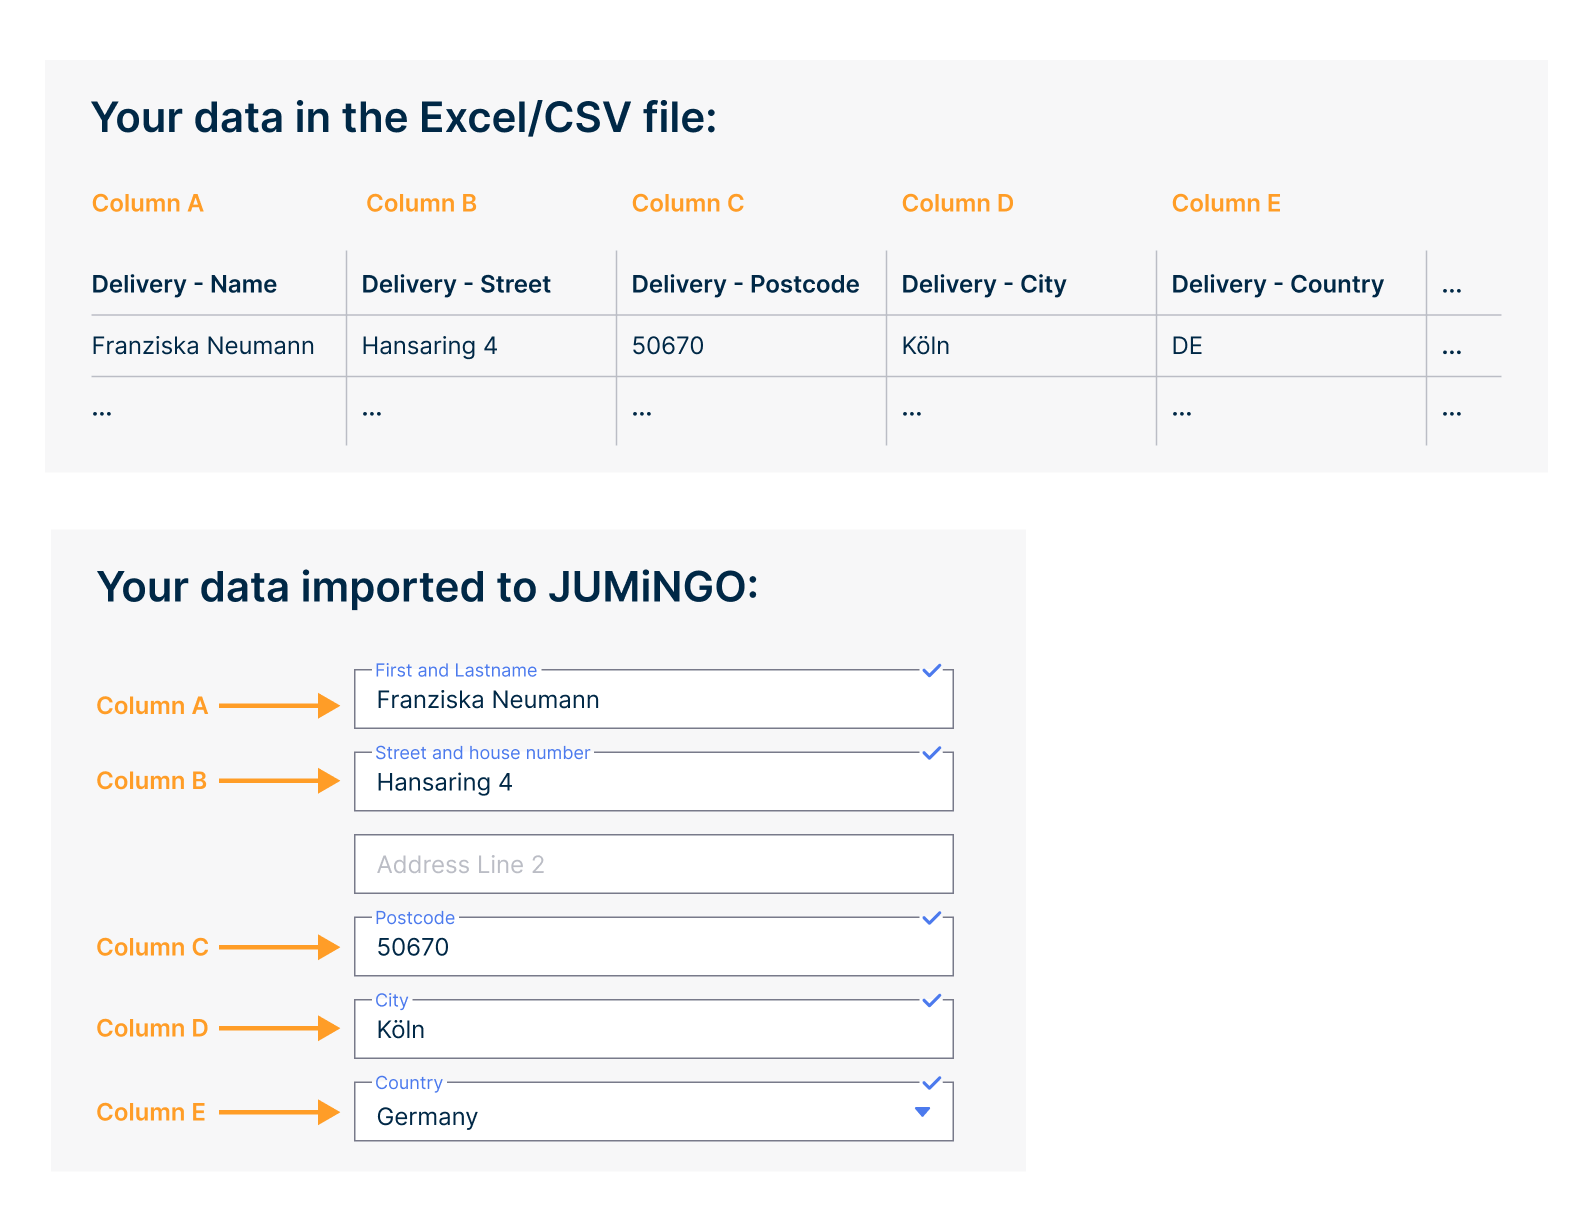
- The columns of your file will be mapped to our data fields during import. To generate a shipment ready for dispatch with the import function, you need a file that has a column for each relevant data field. You can see which fields these are above.
- Please use the first row of your document for the column names. Choose meaningful names.
- You can also use our sample file as a reference. It can be downloaded here.
- If your file does not contain sender address columns, your default sender address from your account will be used.
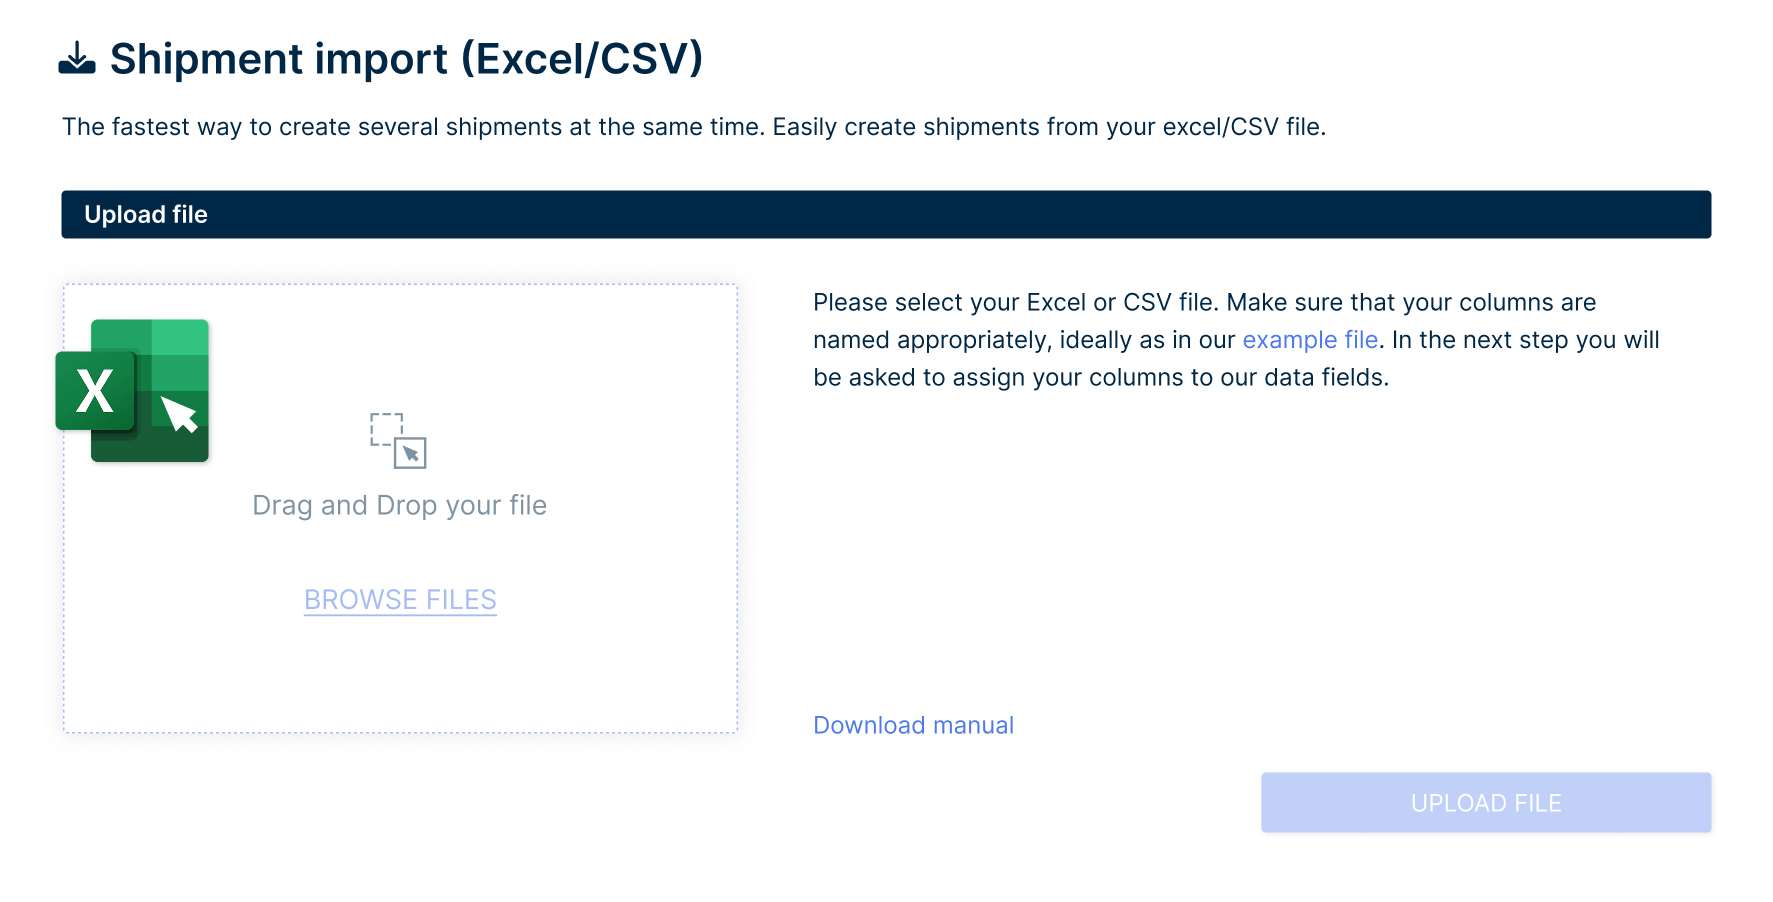
- Your file must not exceed 3MB and must be in Excel or CSV format.
2. Upload file
Upload your prepared file to JUMiNGO.
- Your first shipment import? The columns of your file will automatically be mapped to our data fields – based on the column names.
- Not your first shipment import? If you already imported with the same file structure, use a template for the next one to speed up the process. After each import, we create a template where we save your file structure (if not already existing).
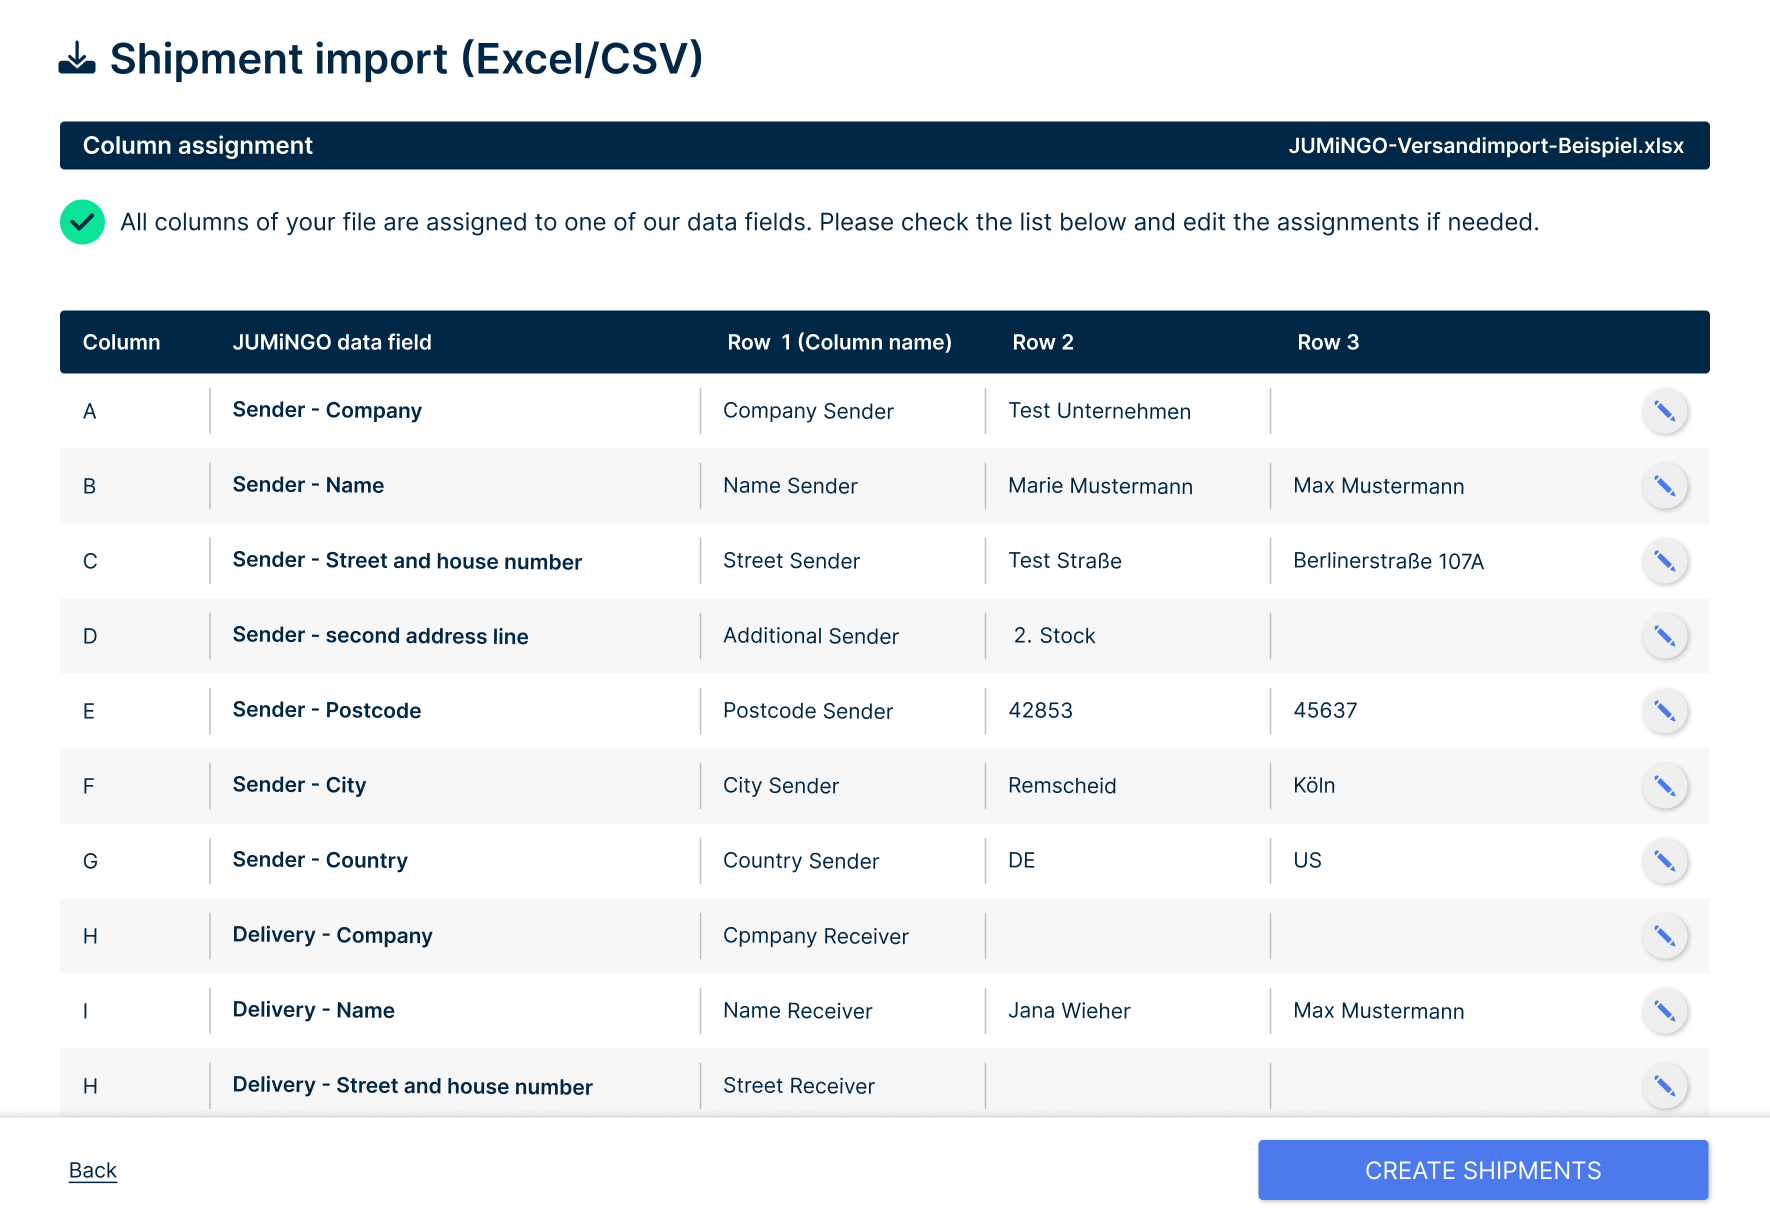
3. Import data
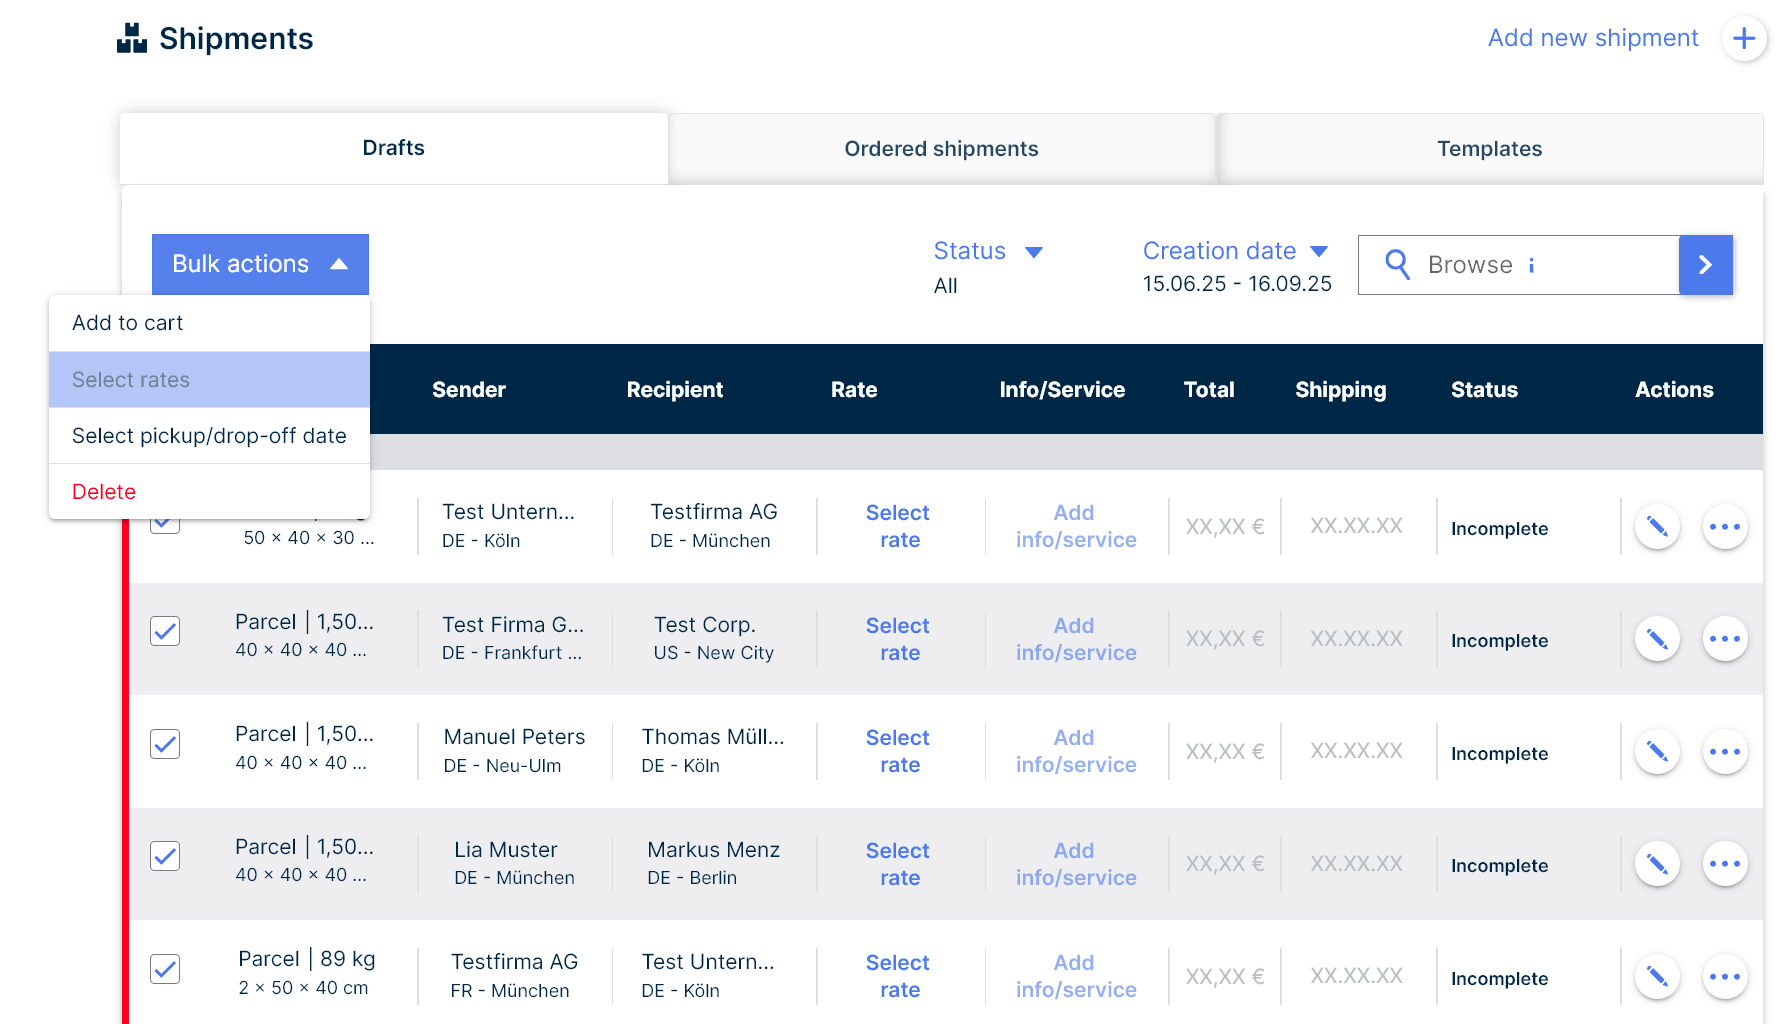
After successful mapping, all shipments will be created in your “Drafts” list and will be ready for further processing.
- A table will display the mappings, and you can make changes there if needed. If fields cannot be clearly mapped by us, you will be asked to do so manually.
- After clicking “Create shipments”, you will be redirected to the drafts. Your shipments will be created there.
4. Review and book shipments
Check the imported shipments, make adjustments if necessary, and add them all to the cart to book the shipment directly.
Start shipment import here.
Do you have a question that we couldn’t answer in our Help Center?
Please create a support ticket. Our customer service will get back to you as quickly as possible.